Quick Start for view26 Reports
Welcome to VIEW26. Let’s get you started with using the App!
You’ve got Questions? View26 Support team is here to help. Reach out to us @ view26 Trello Support
Check out our FAQs for answers to some commonly asked questions.
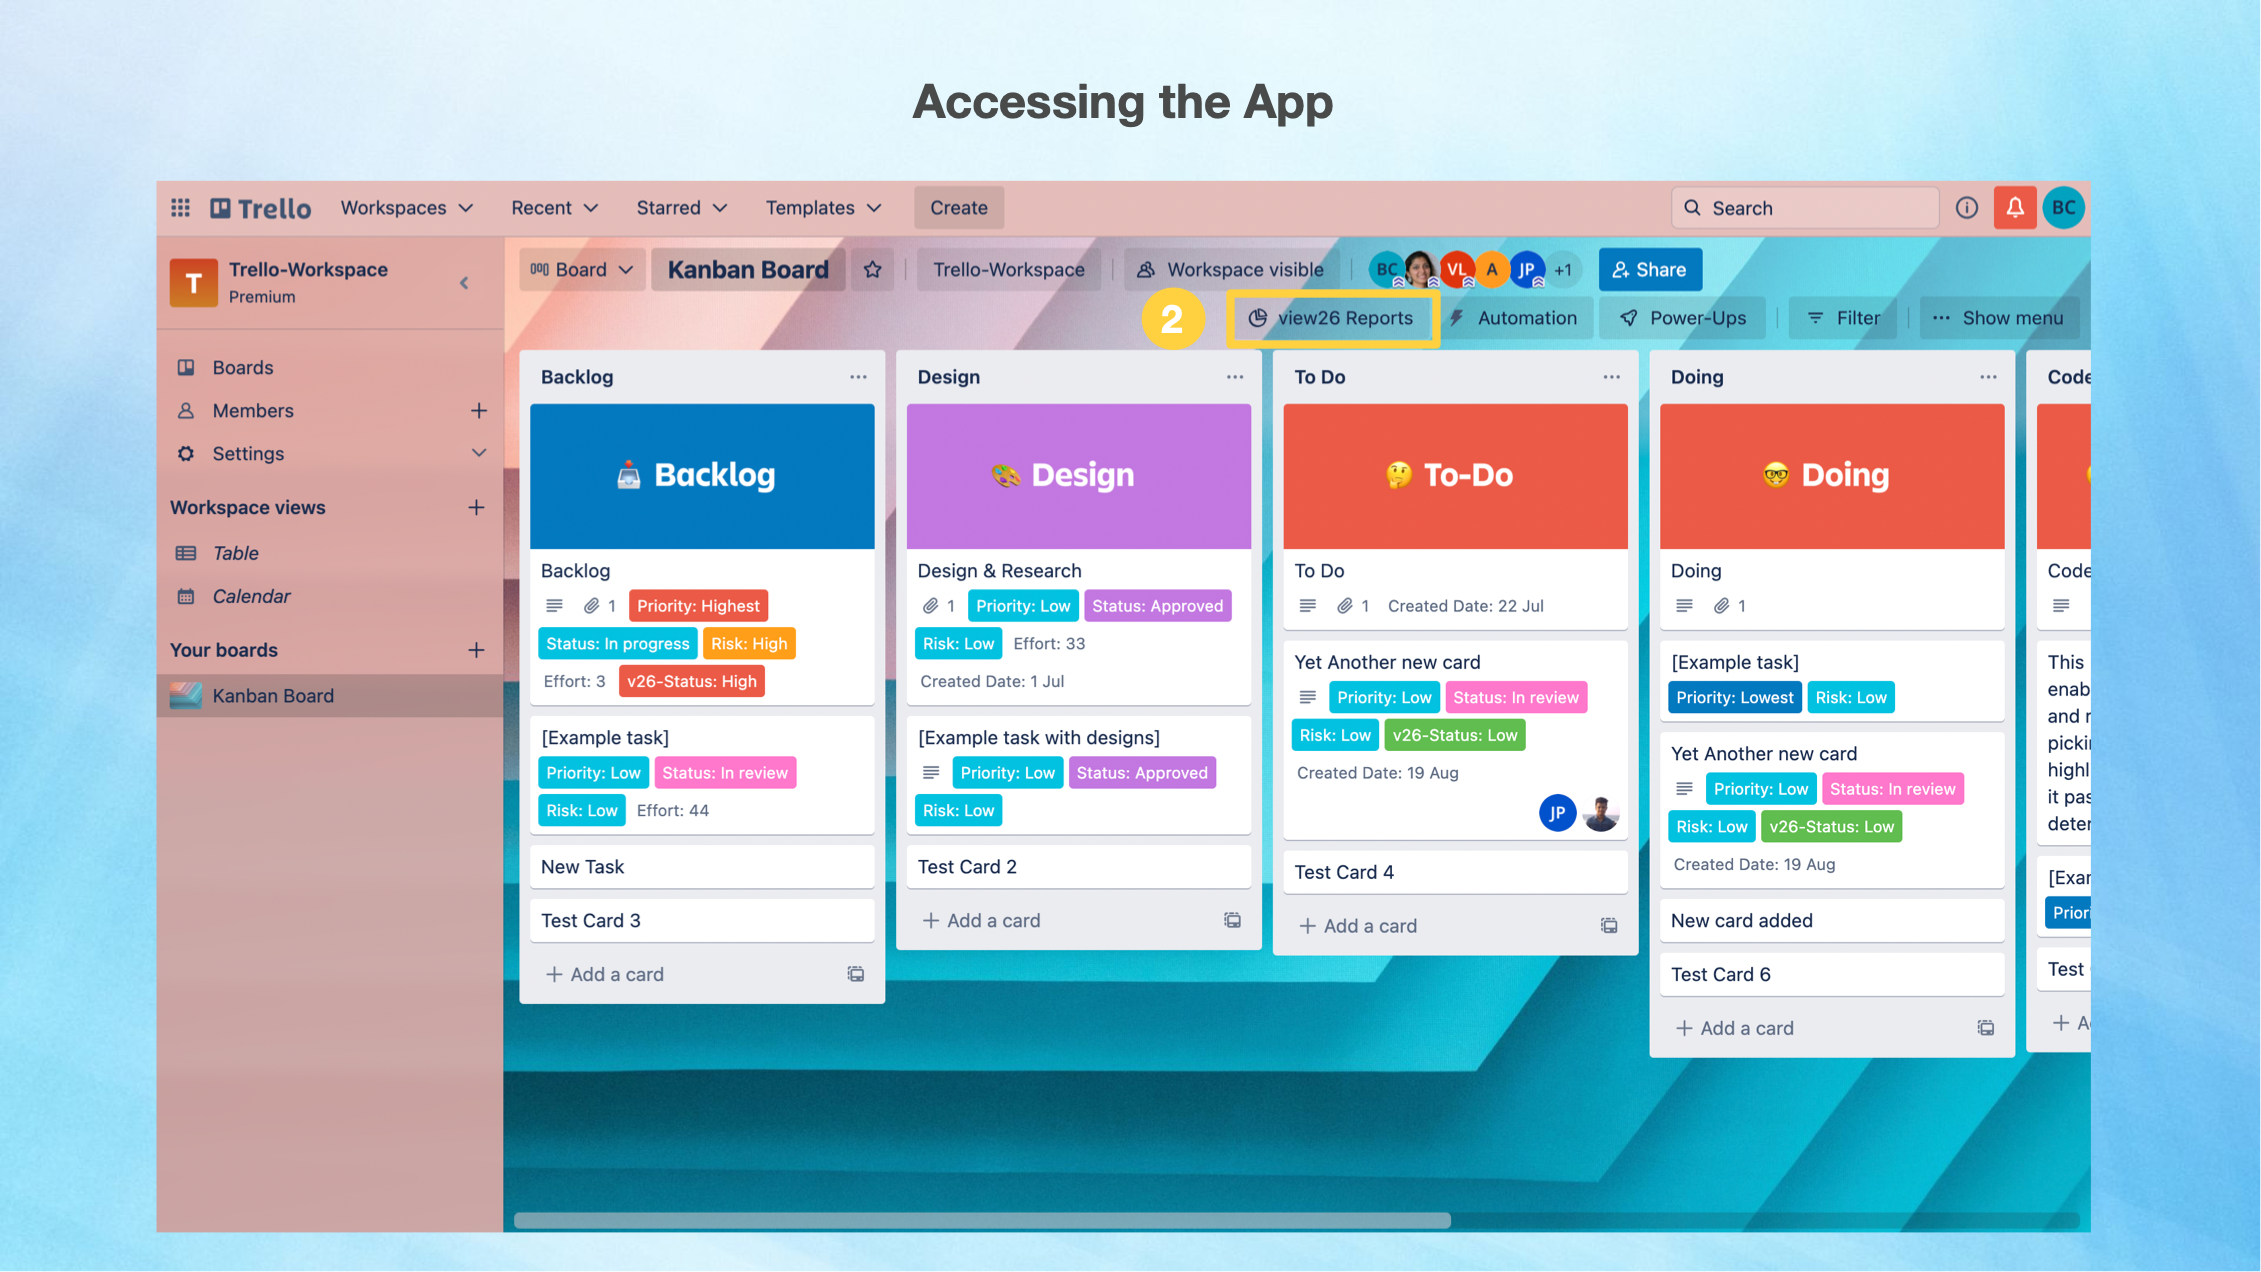
Access the App
Install view26 Reports app
Click on view26 Reports that appears at the top
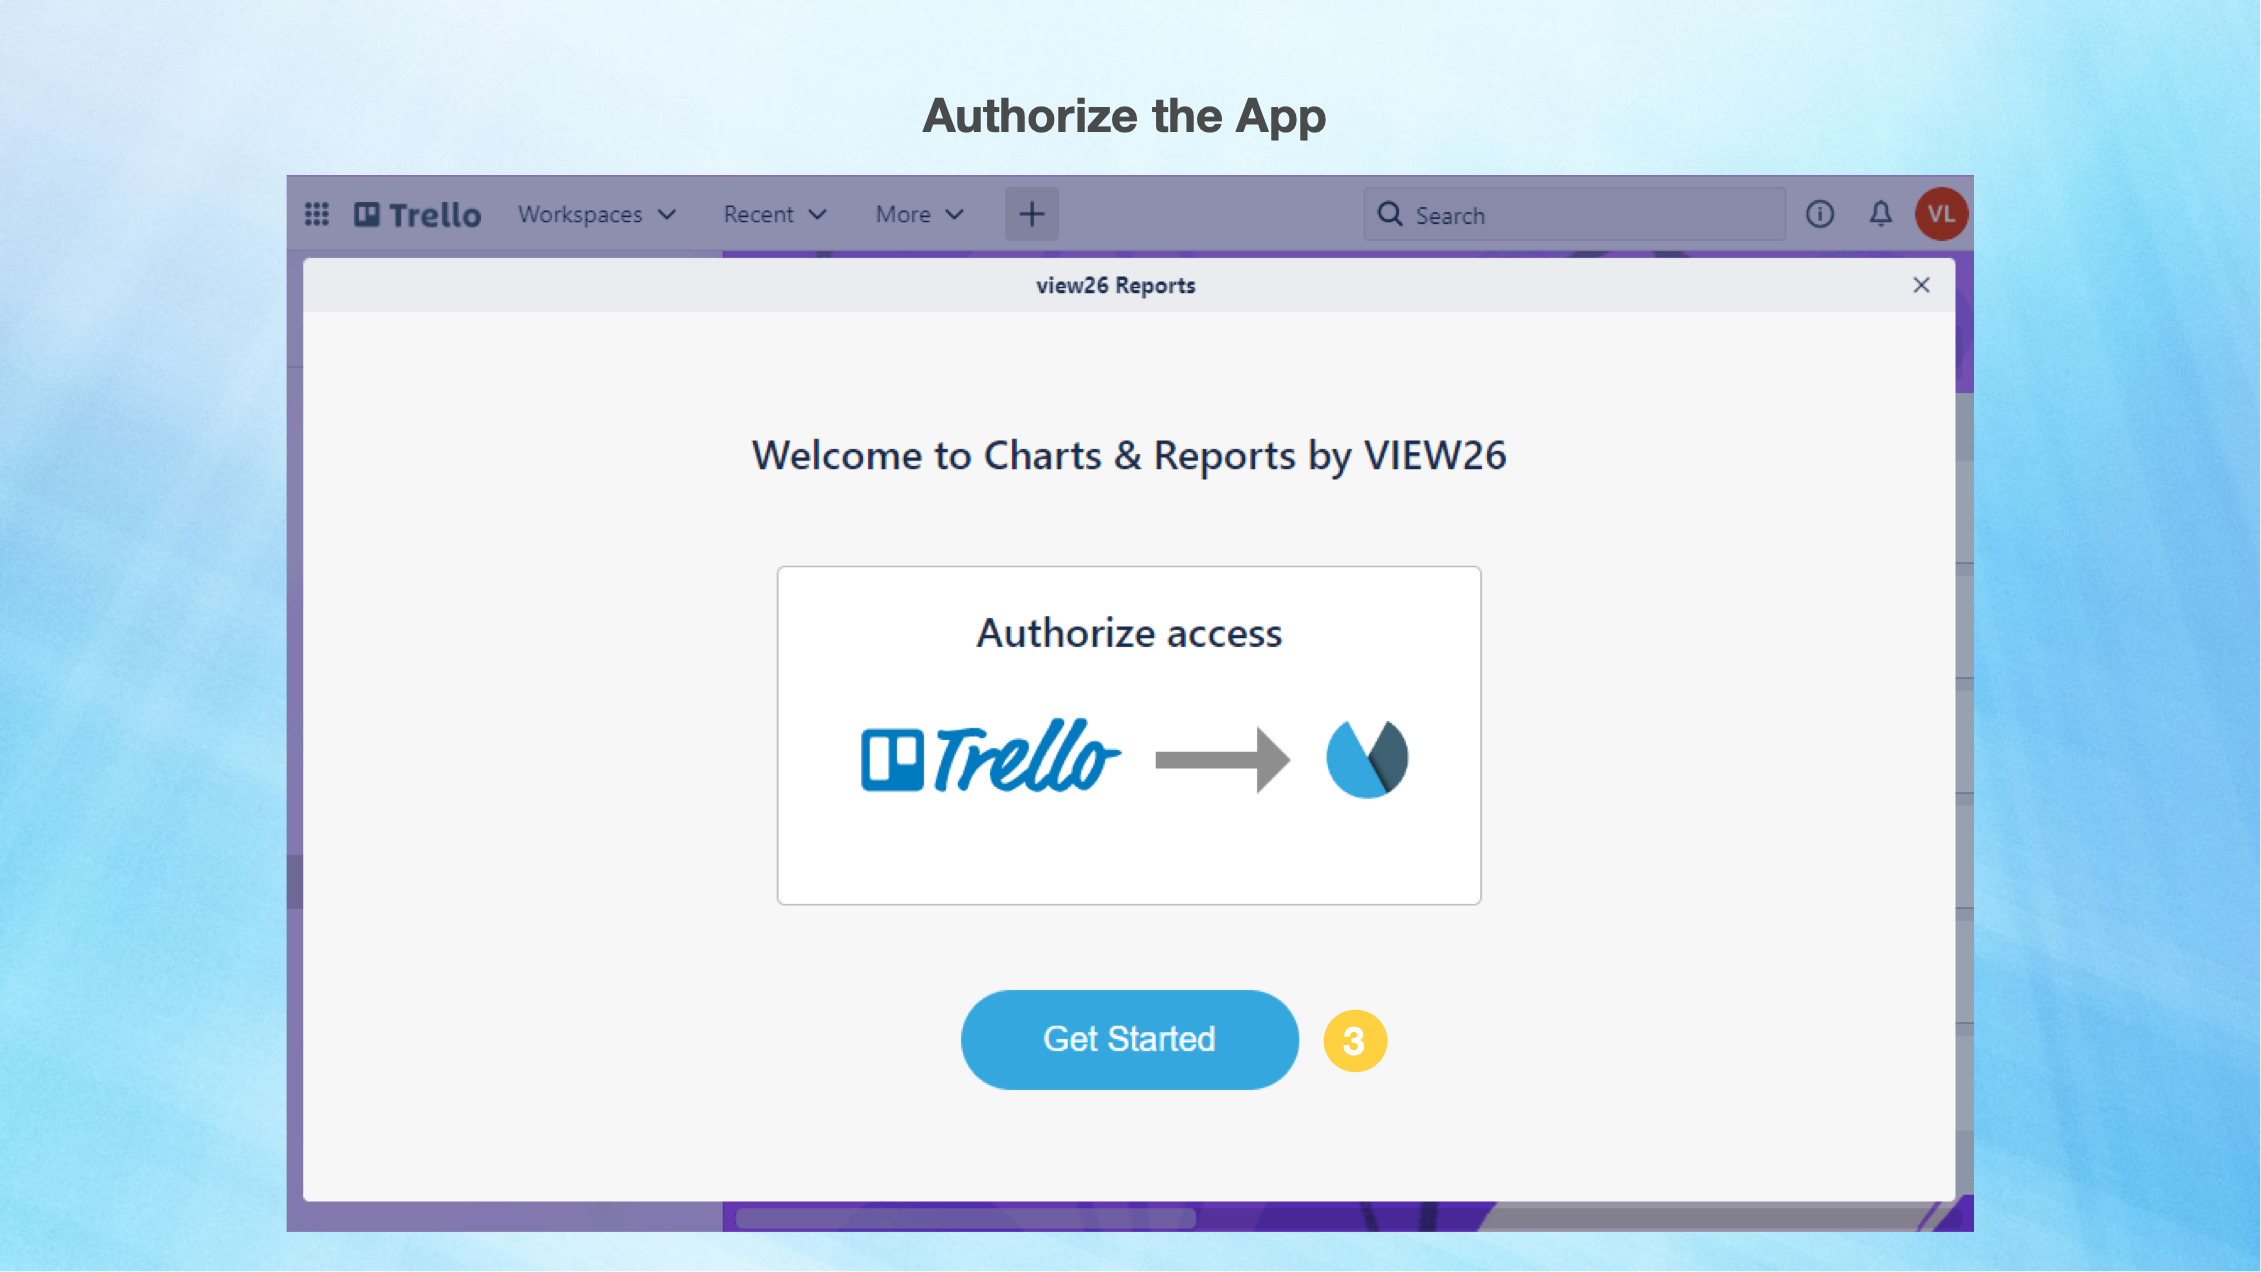
Authorize the App
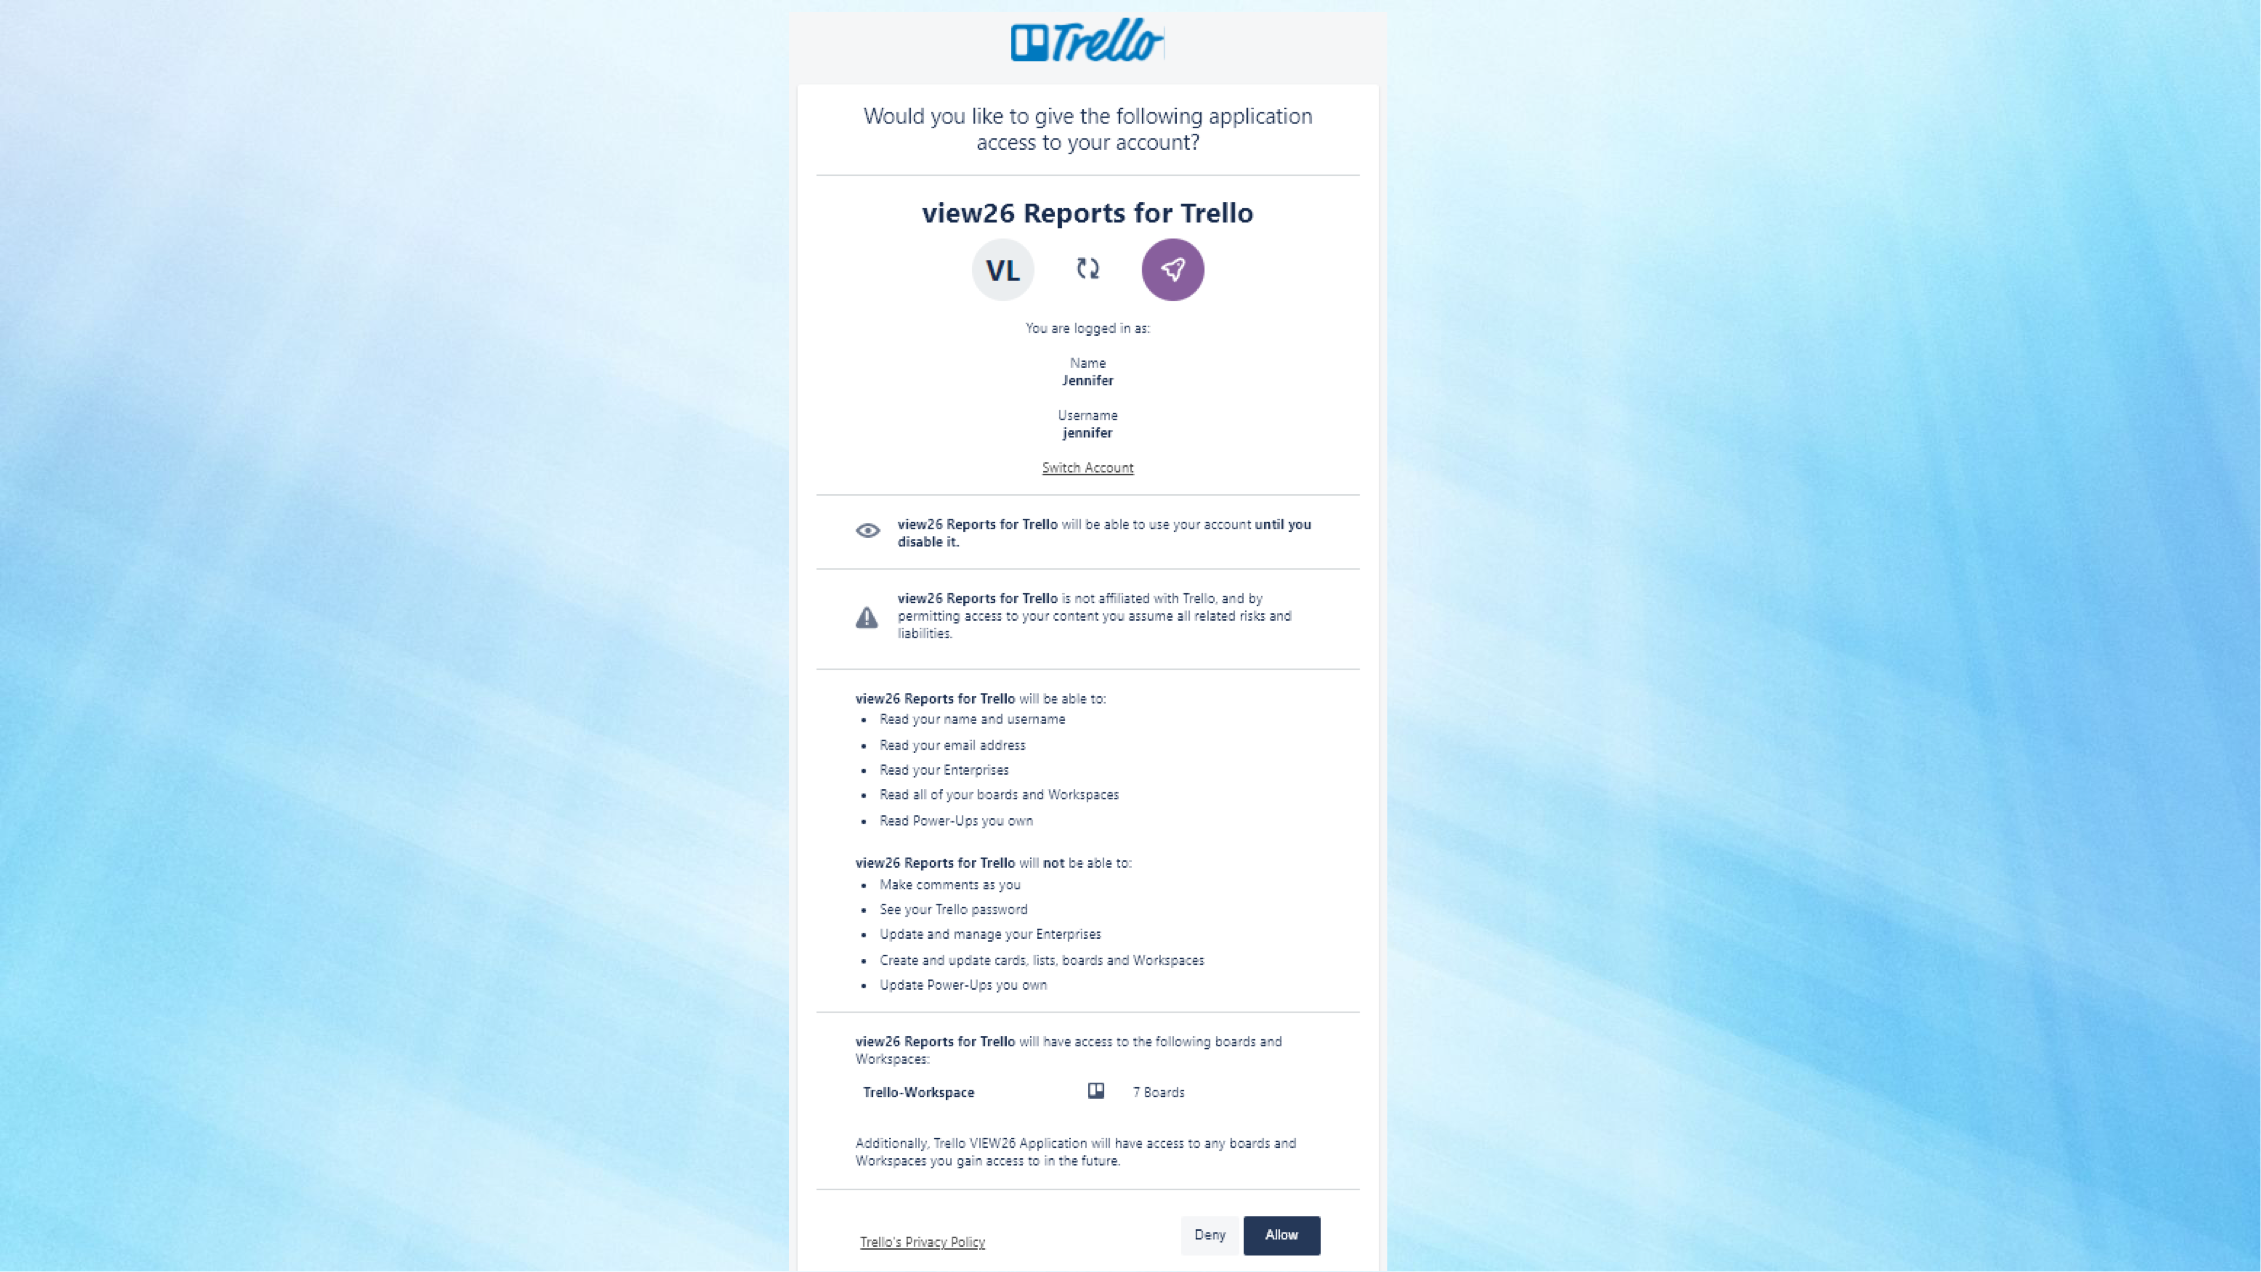
3 Click on Get Started button to authorise access and Click Allow on the Permissions page to start using the app.
Create a View
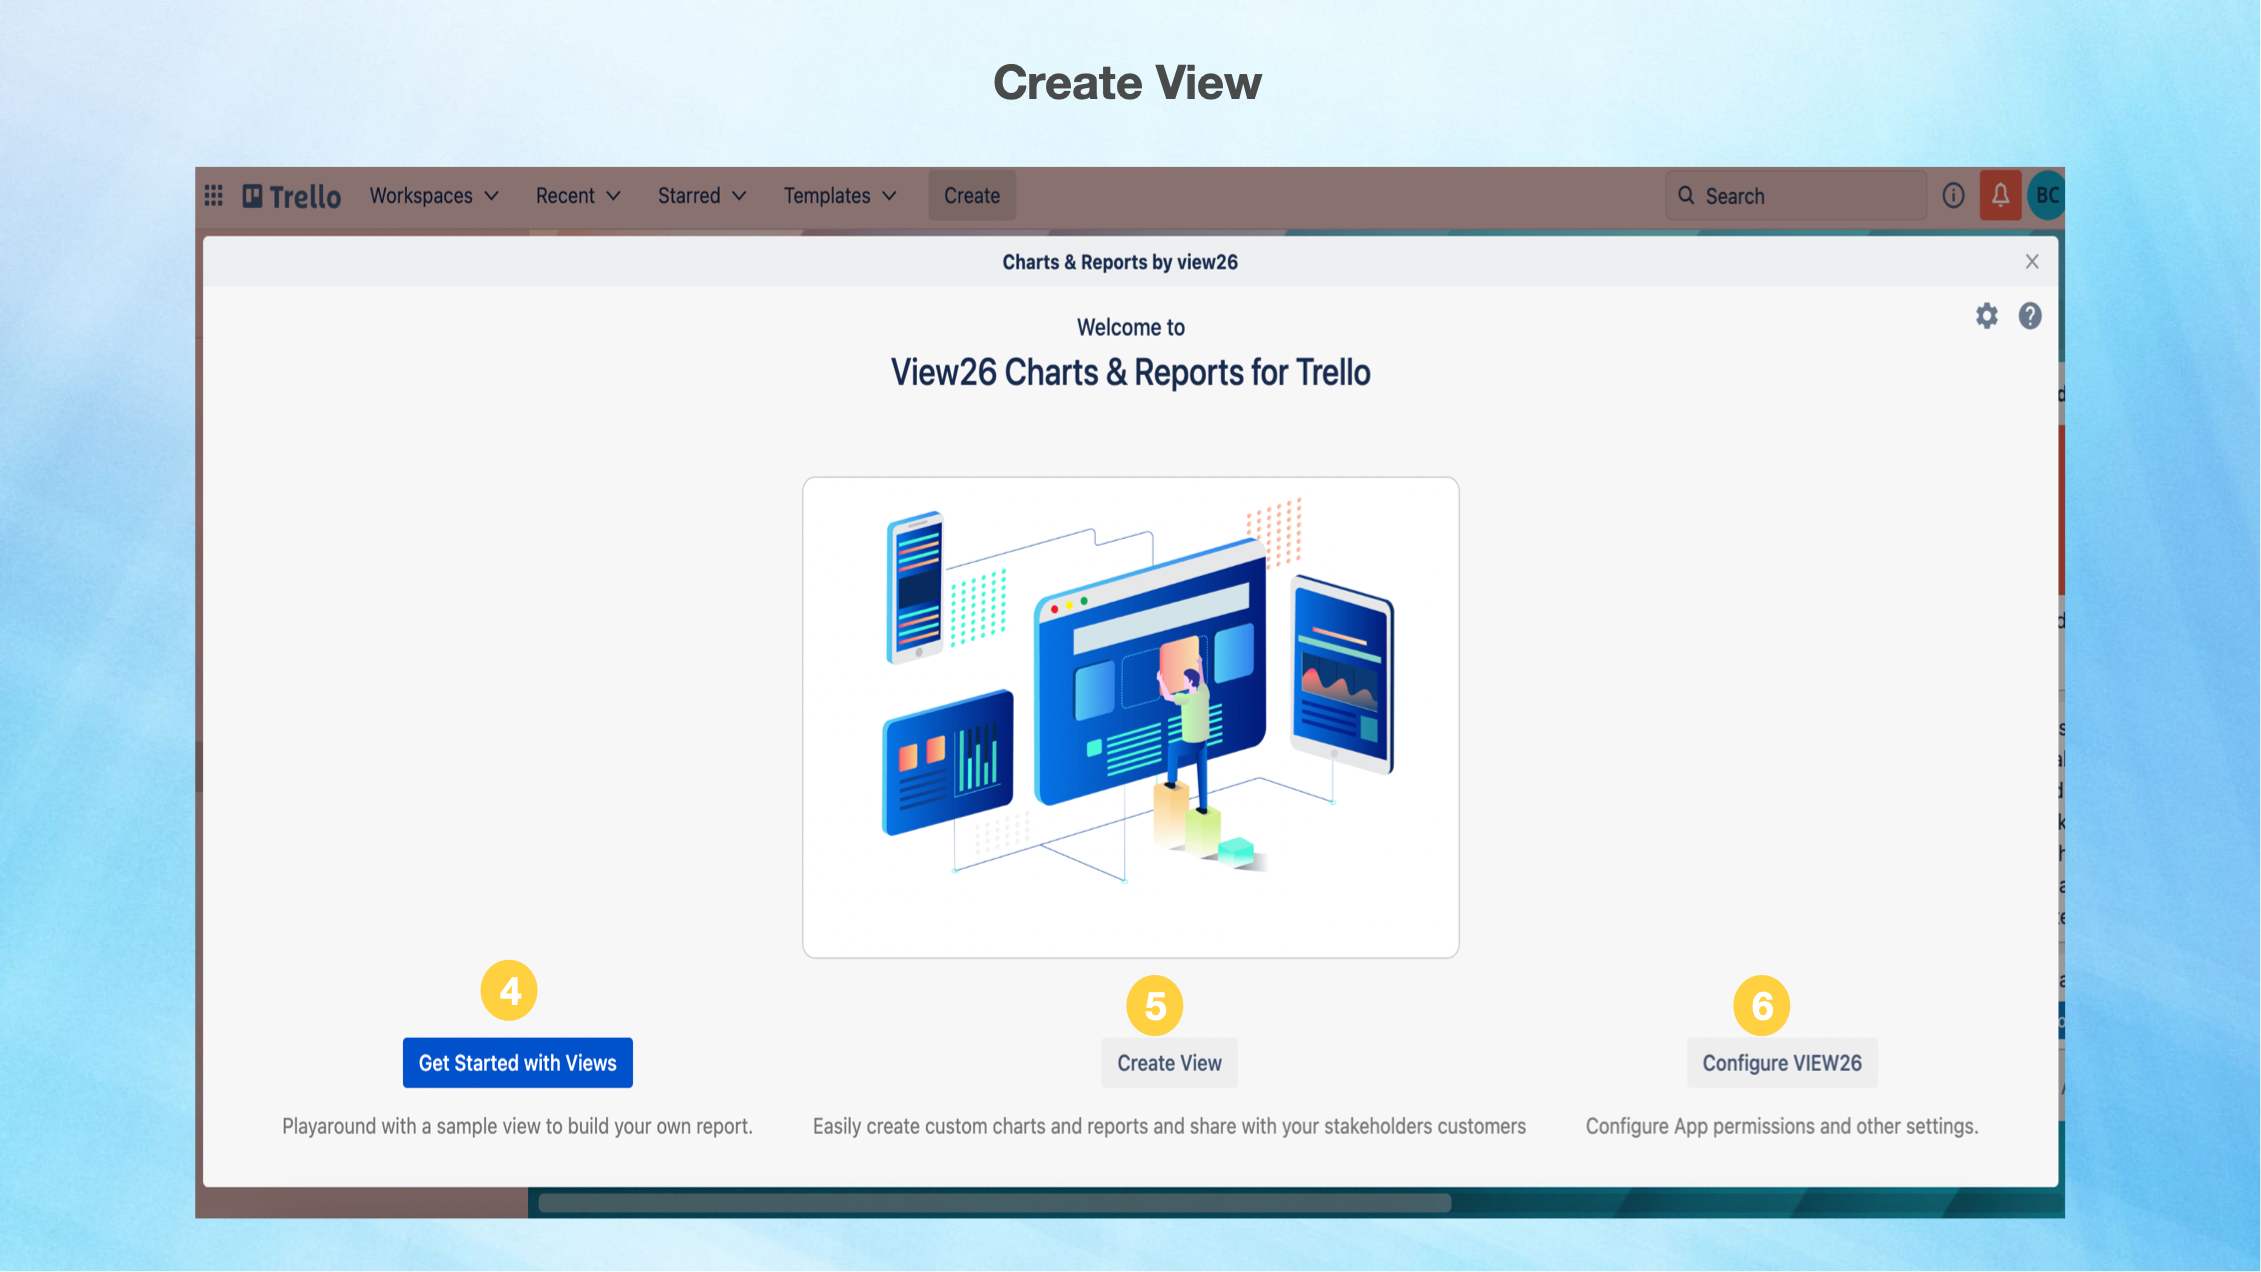
A view is a collection of widgets, which the user can view or generate reports from and even share with customers.
4. If this is your first time it would be great to Click on Get Started with Views to generate a Welcome View . This will give you a good idea on the entire dashboard and the different views that get automatically generated with your Project data
5. Click on Create view to create a view with your own Custom Charts
6. You can also Configure App settings here
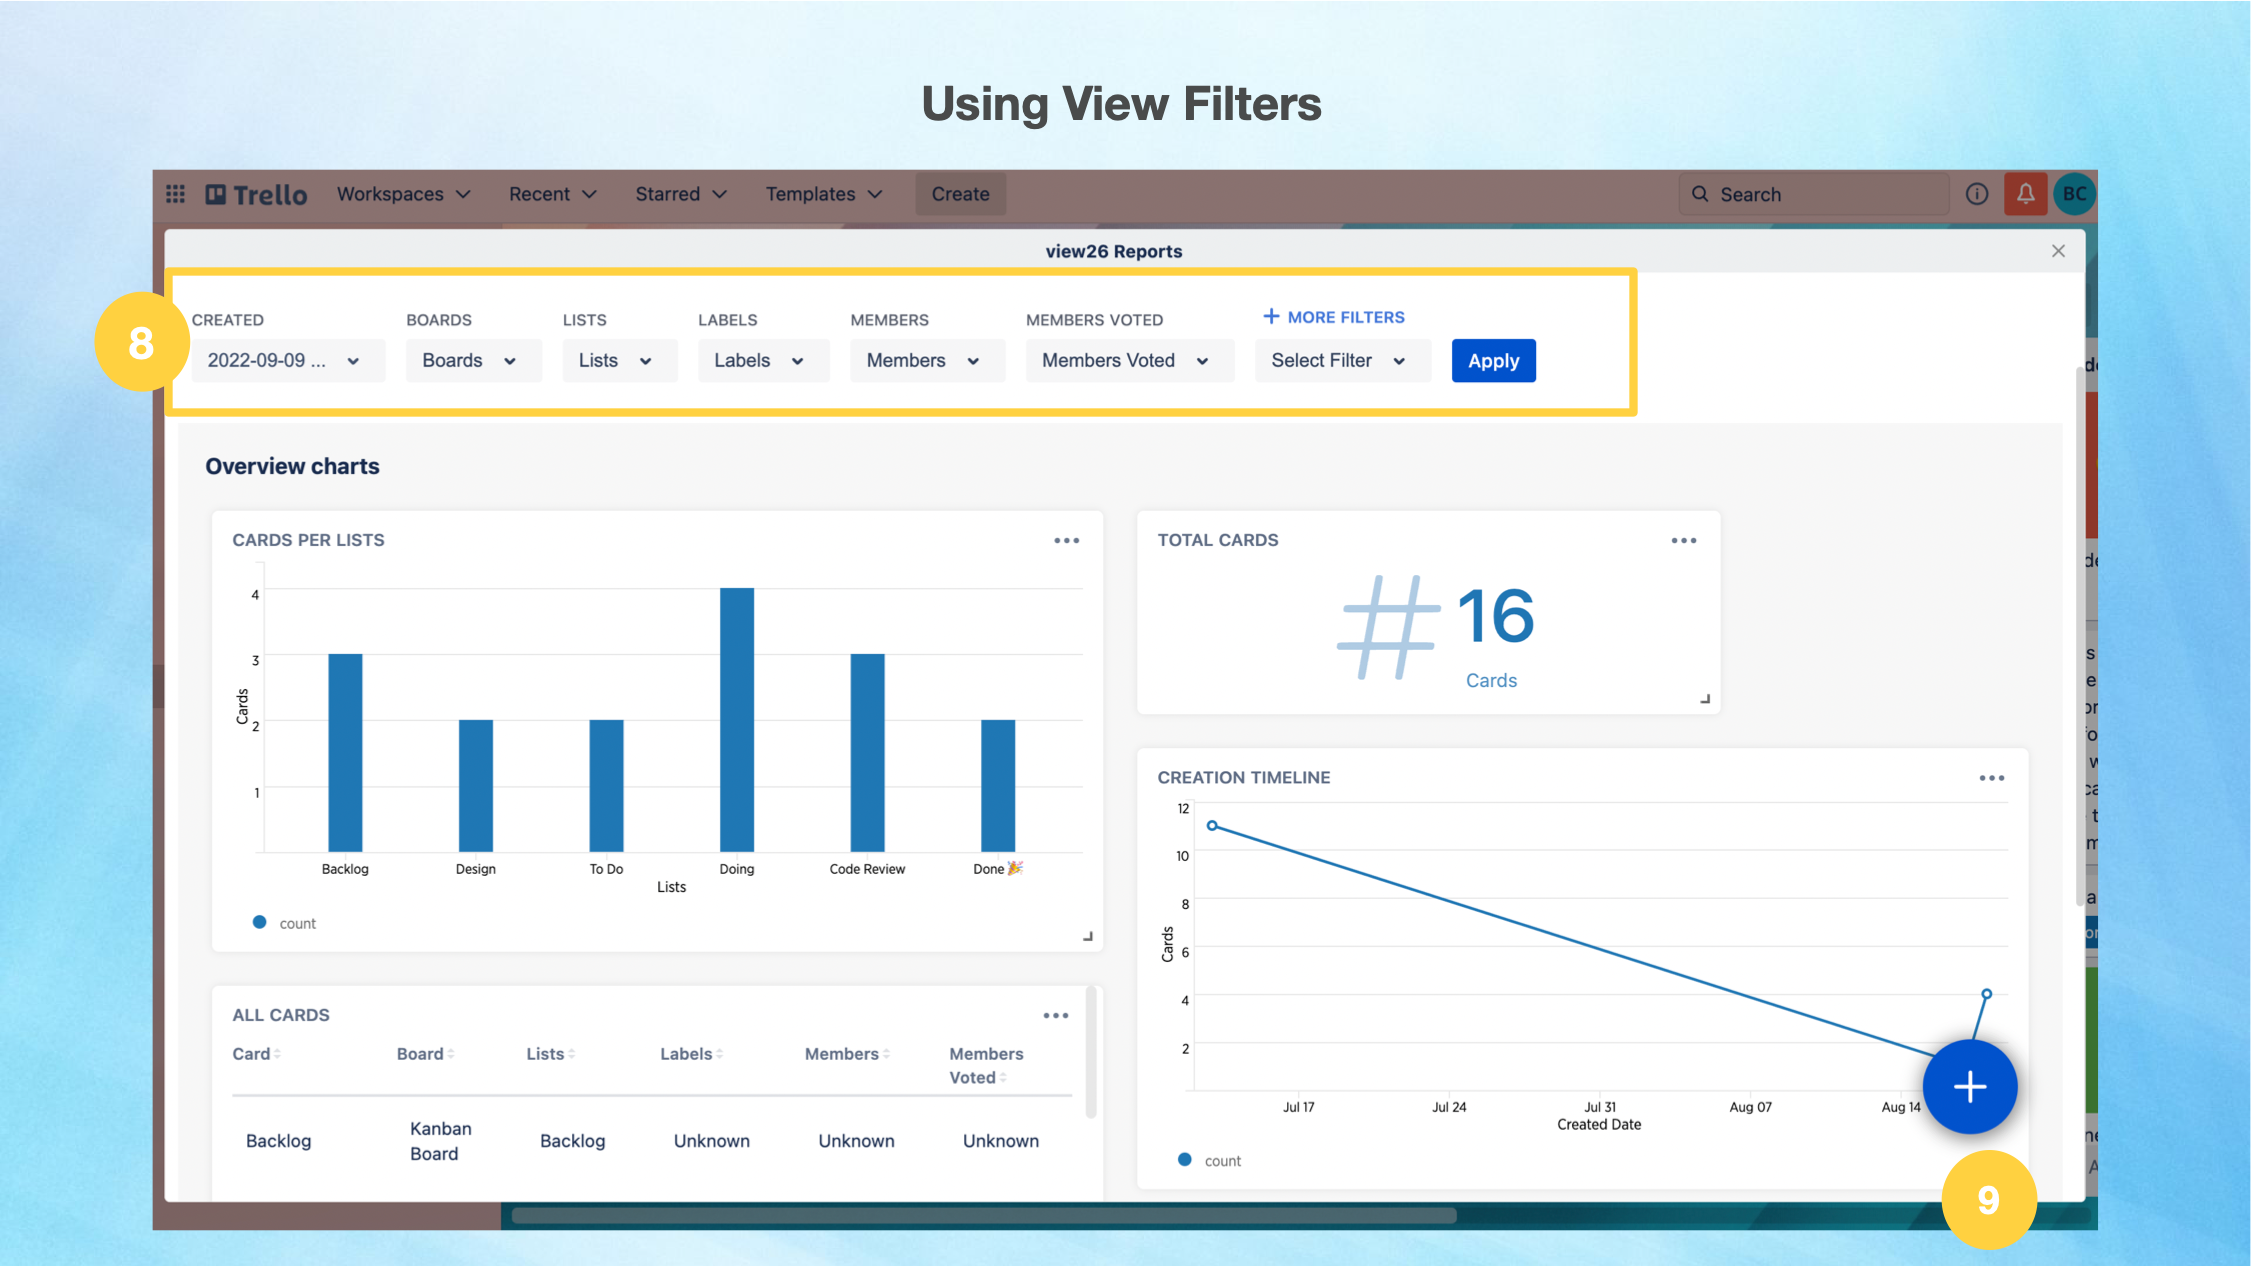
7. The Get Started with Views shown above will open up a beautiful View that get automatically generated with your Project data. Once you have your view, you can customise it to just the way you want it.
8. The View displays a set of Filters that can be applied. Watch the view change when different filter values are applied. Click on + More Filters to to add your your custom Filters. Here you can select any Trello field you wish to apply in your Views.
10. Click the + on the lower right corner to open up the widget panel
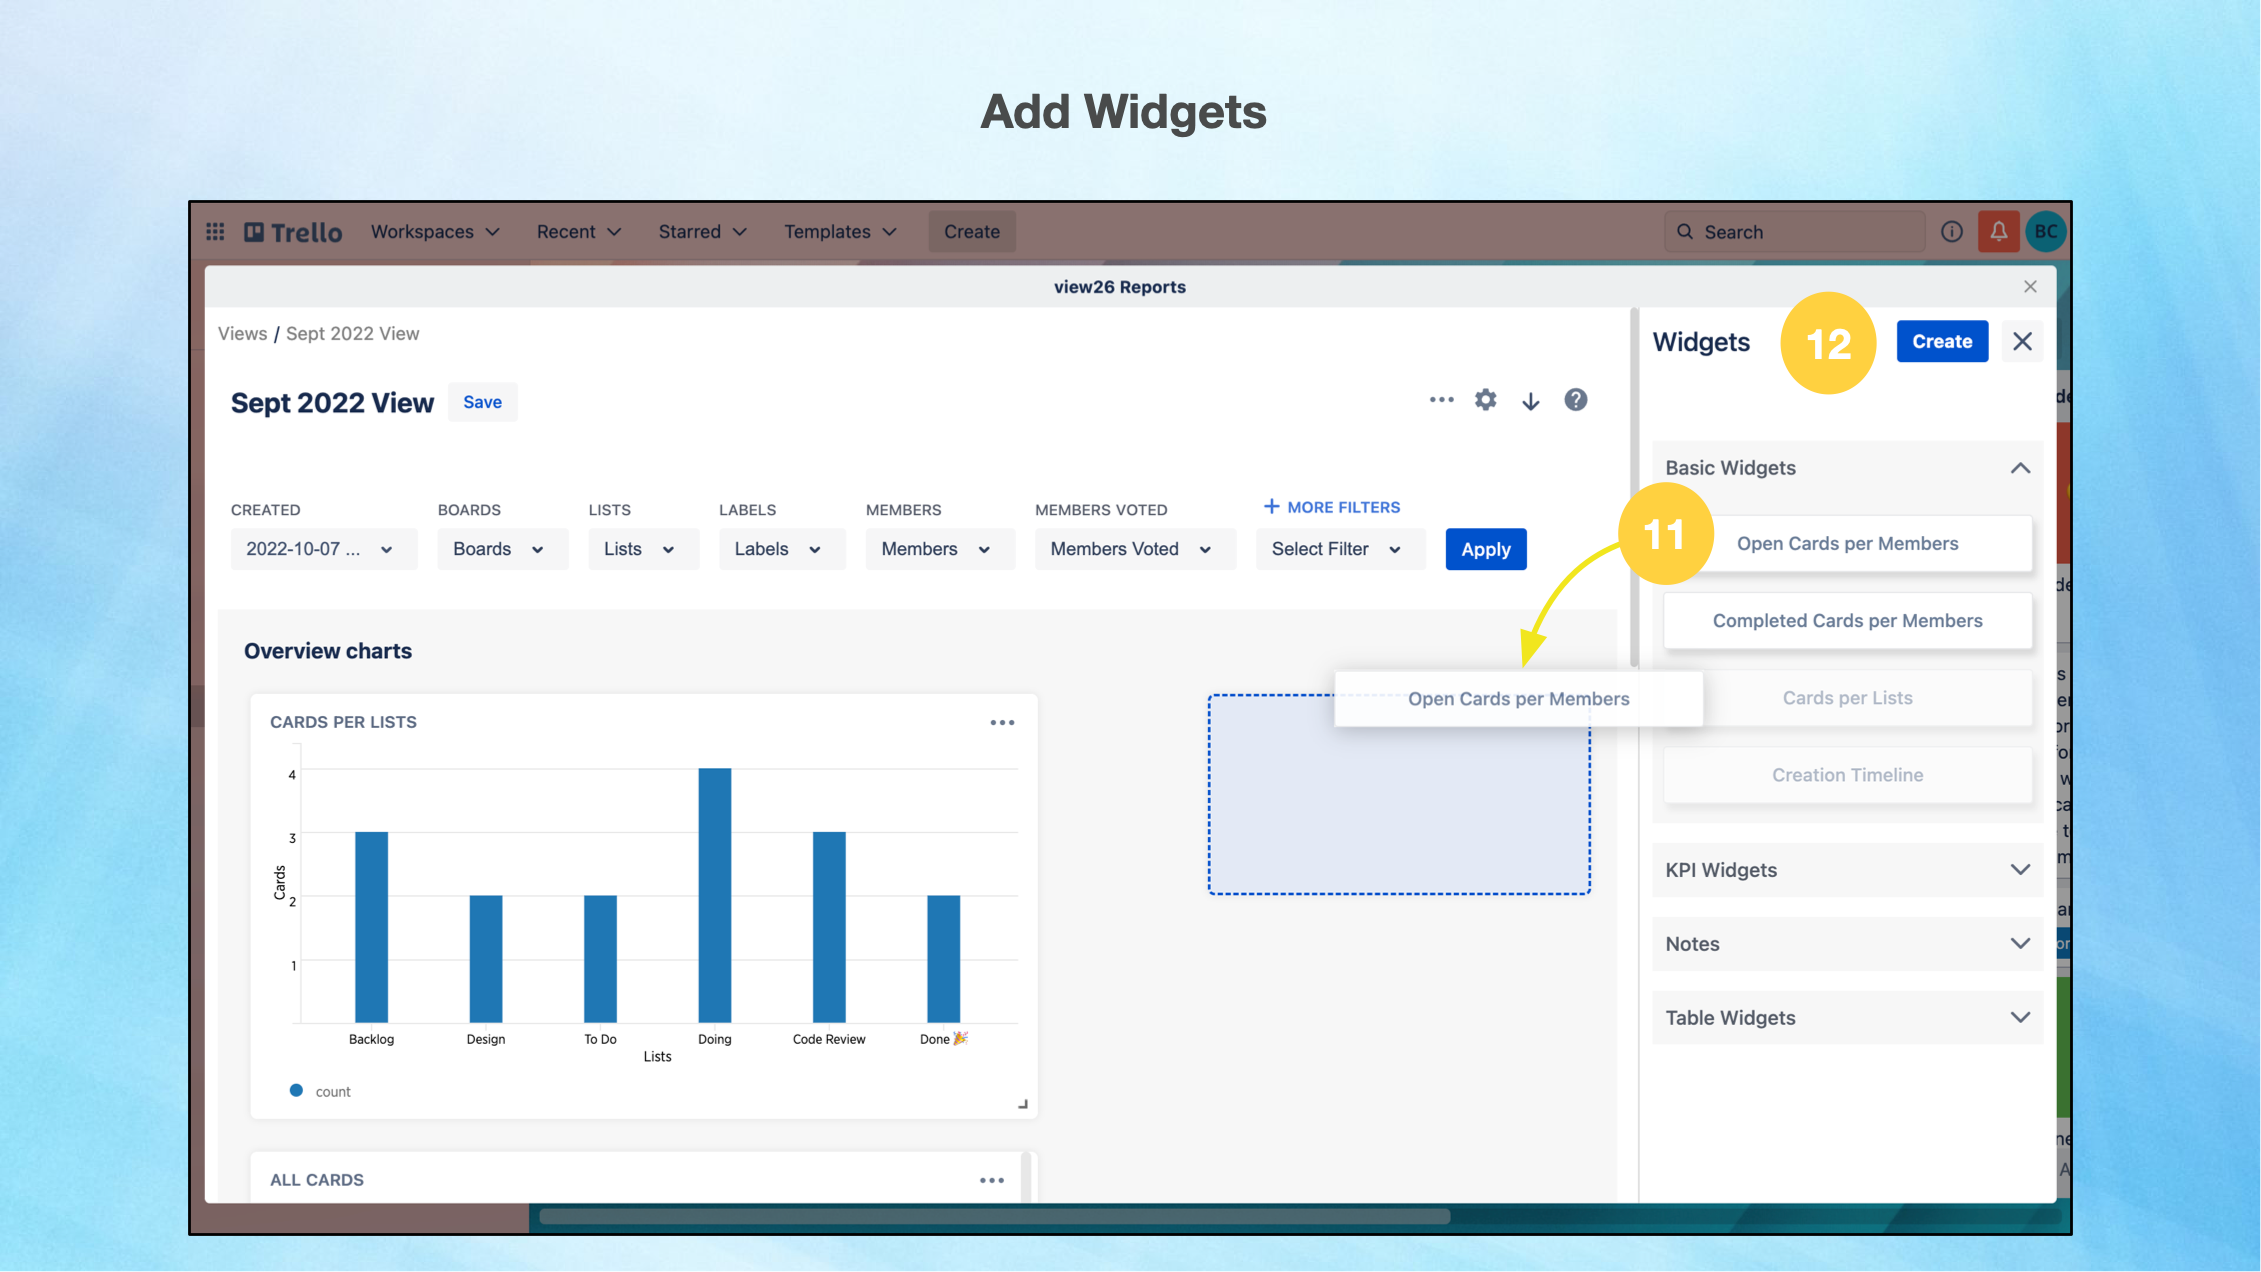
11. To add our Built-in Widgets: Select the Widget you want to add from the list in the widget panel (Here in this case we select the Basic Widget: Open Cards per Members). Drag and drop the widget into the relevant section.The greyed out widget options(eg : Cards per List , Creation Timeline shown below) are already part of the view and hence cannot be selected again.
12. To add Custom Widgets: Click on Create Button on the top right of the page
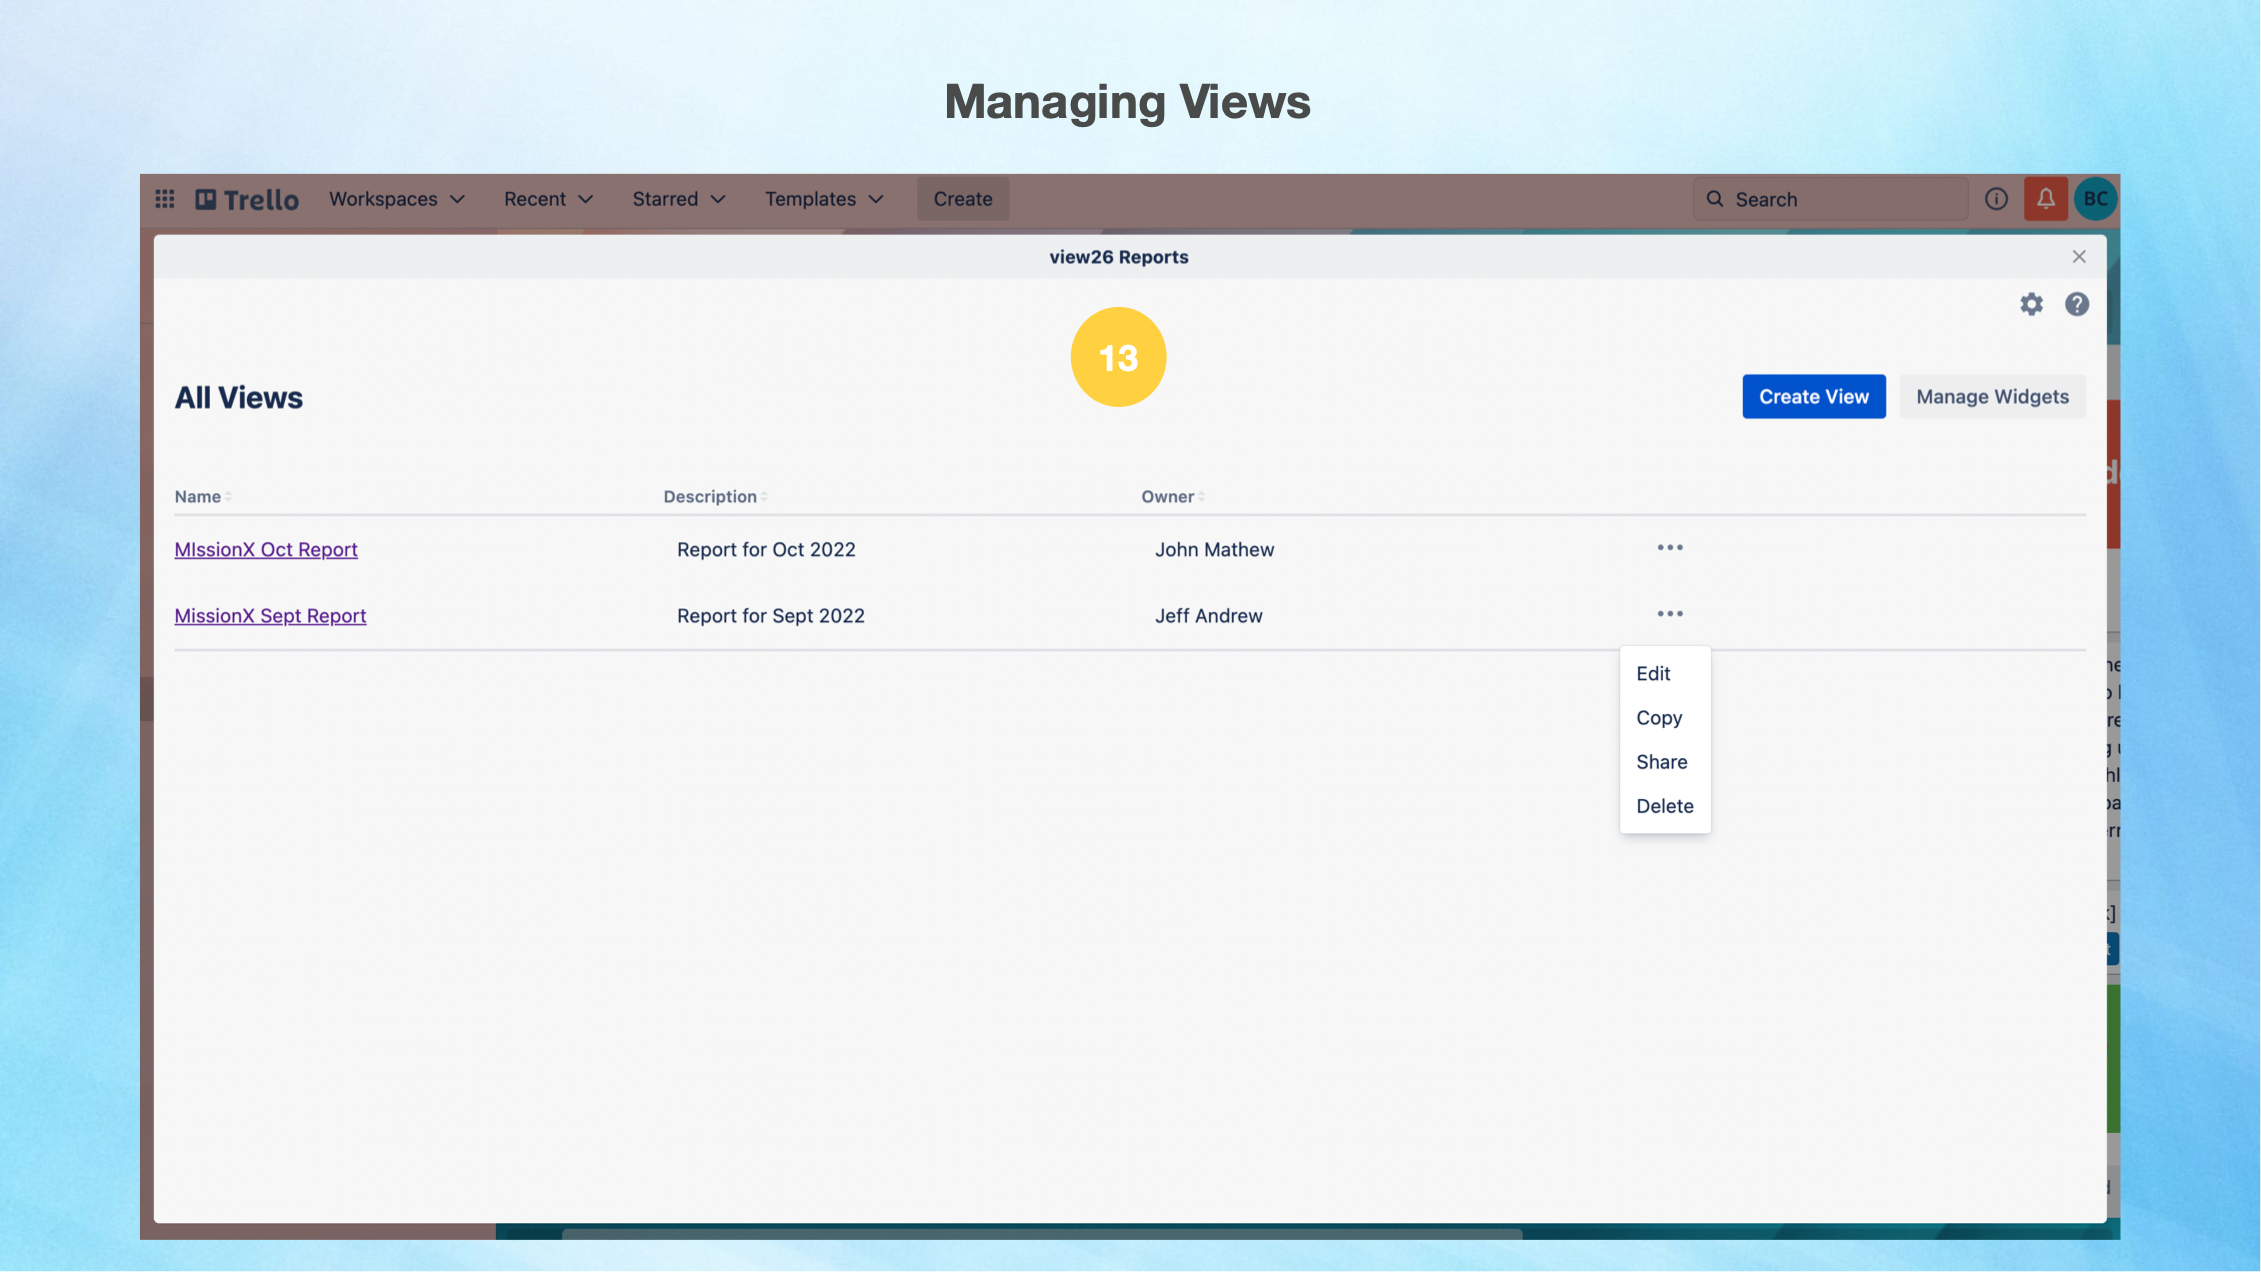
13. The view26 Reports for Trello Home Page displays the list of all Views that you have created as well as Views that have been shared with your Organisation. (If sharing has been enabled for a View, it would be visible to everyone in the Organization). Here you can access the Views, Edit / Share / Copy / Delete a View. You can also create a new view by clicking the Create View button . Click on Manage Widgets to manage your custom widgets that have been created if any. You can also modify the app settings here on this page.
Analyse a View
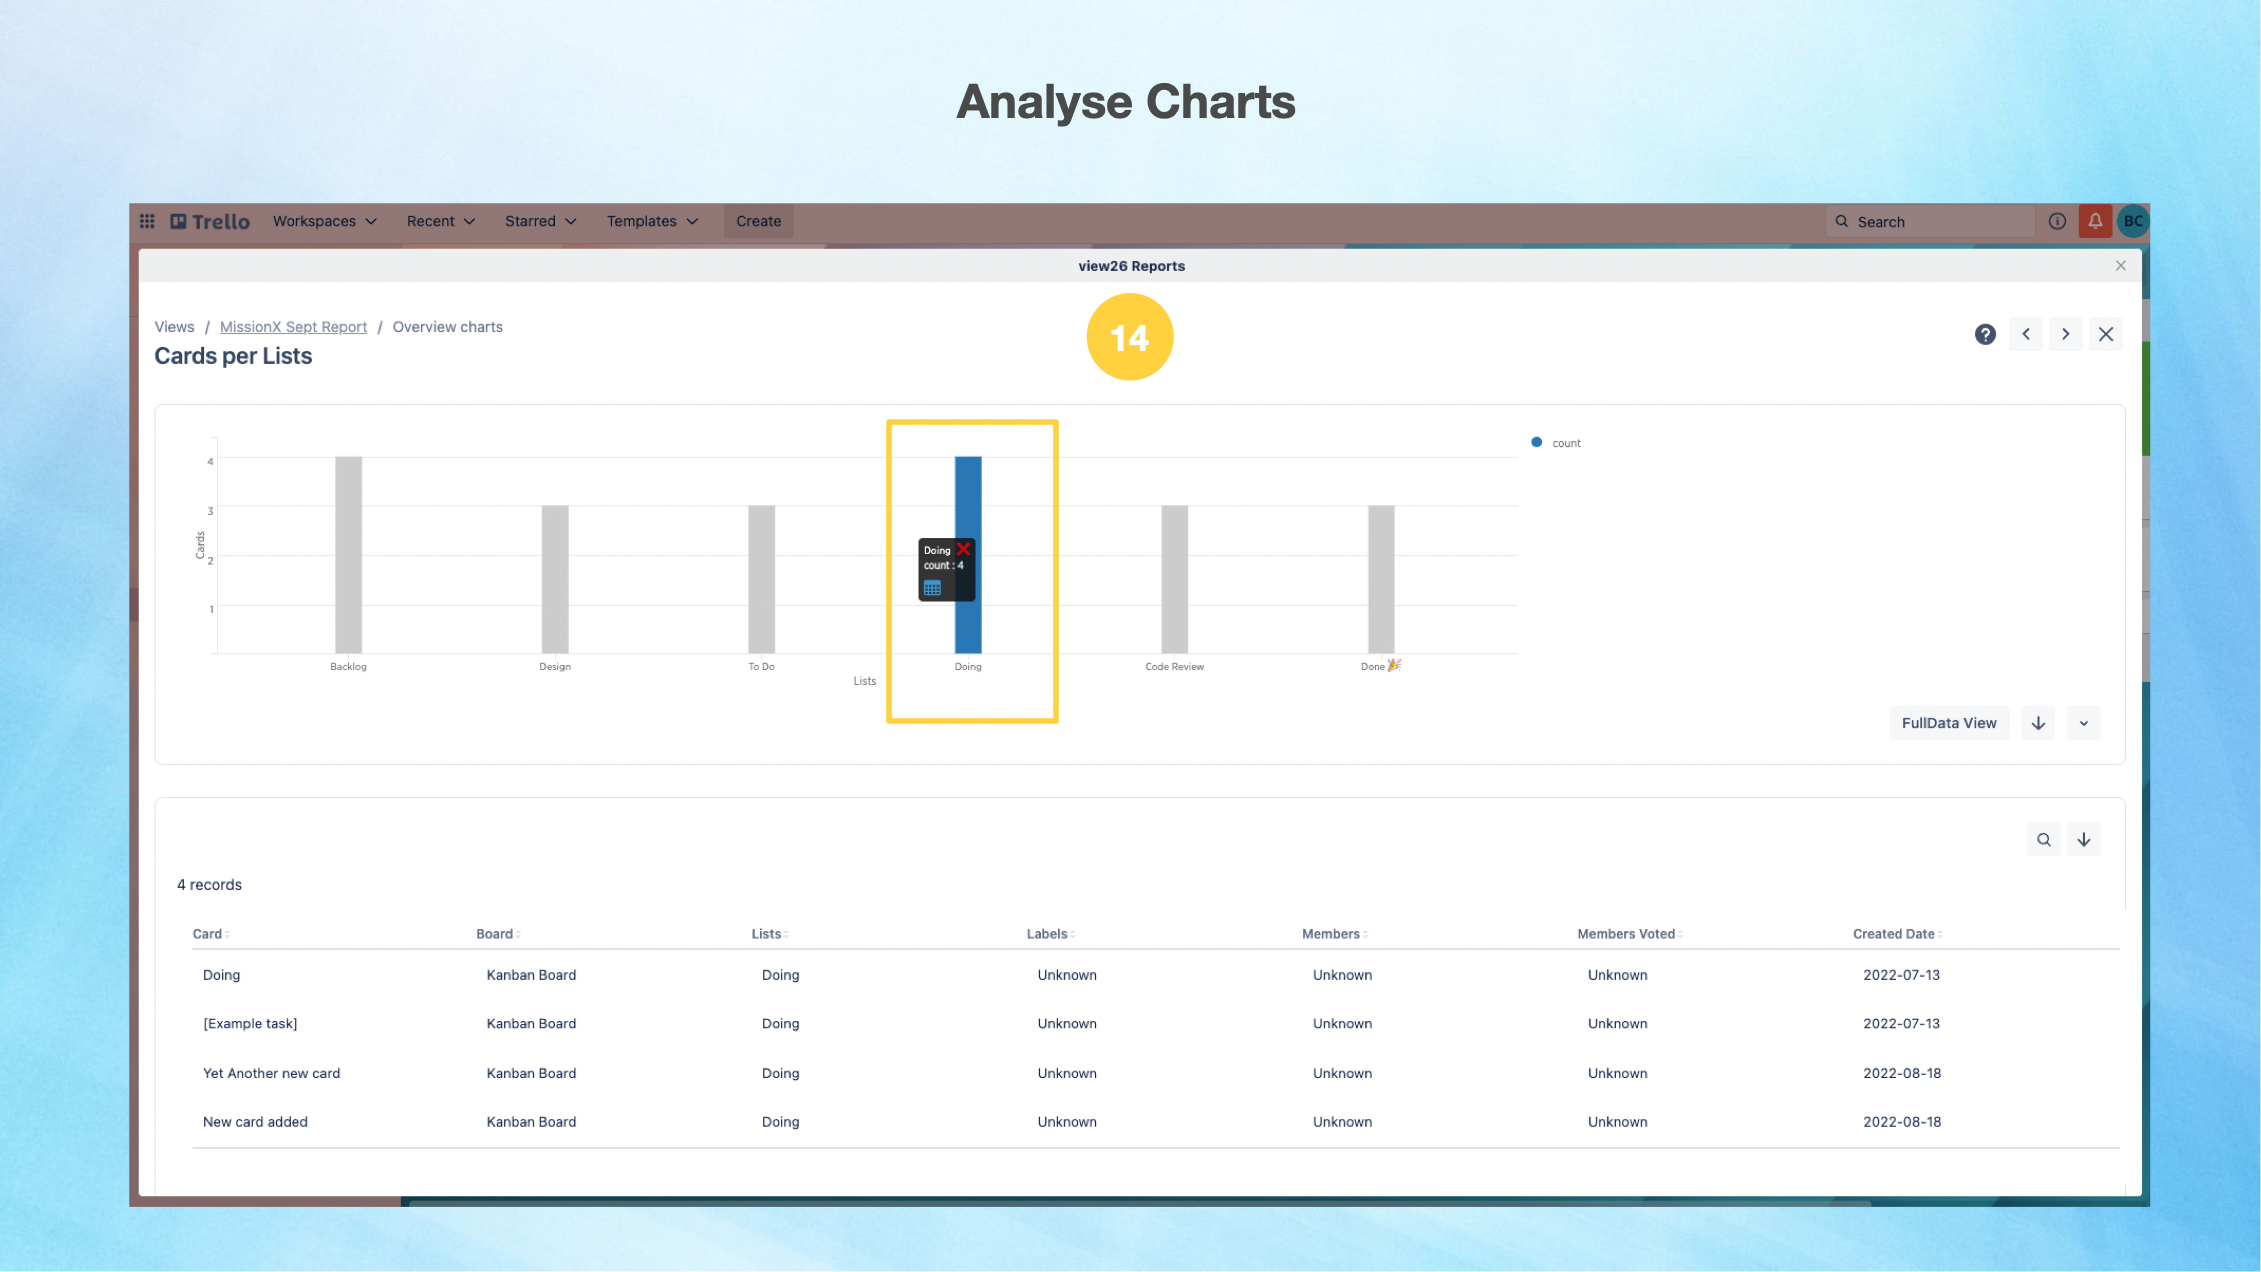
14. Make a detailed analysis of chart data by clicking / hover over the Data Point of interest to drill down to details.
You can also choose to view the details of the entire Chart Data in table format below the chart. It is possible to Download the Page or Change your View to Bar, Table, Horizontal Bar or Pie Charts.
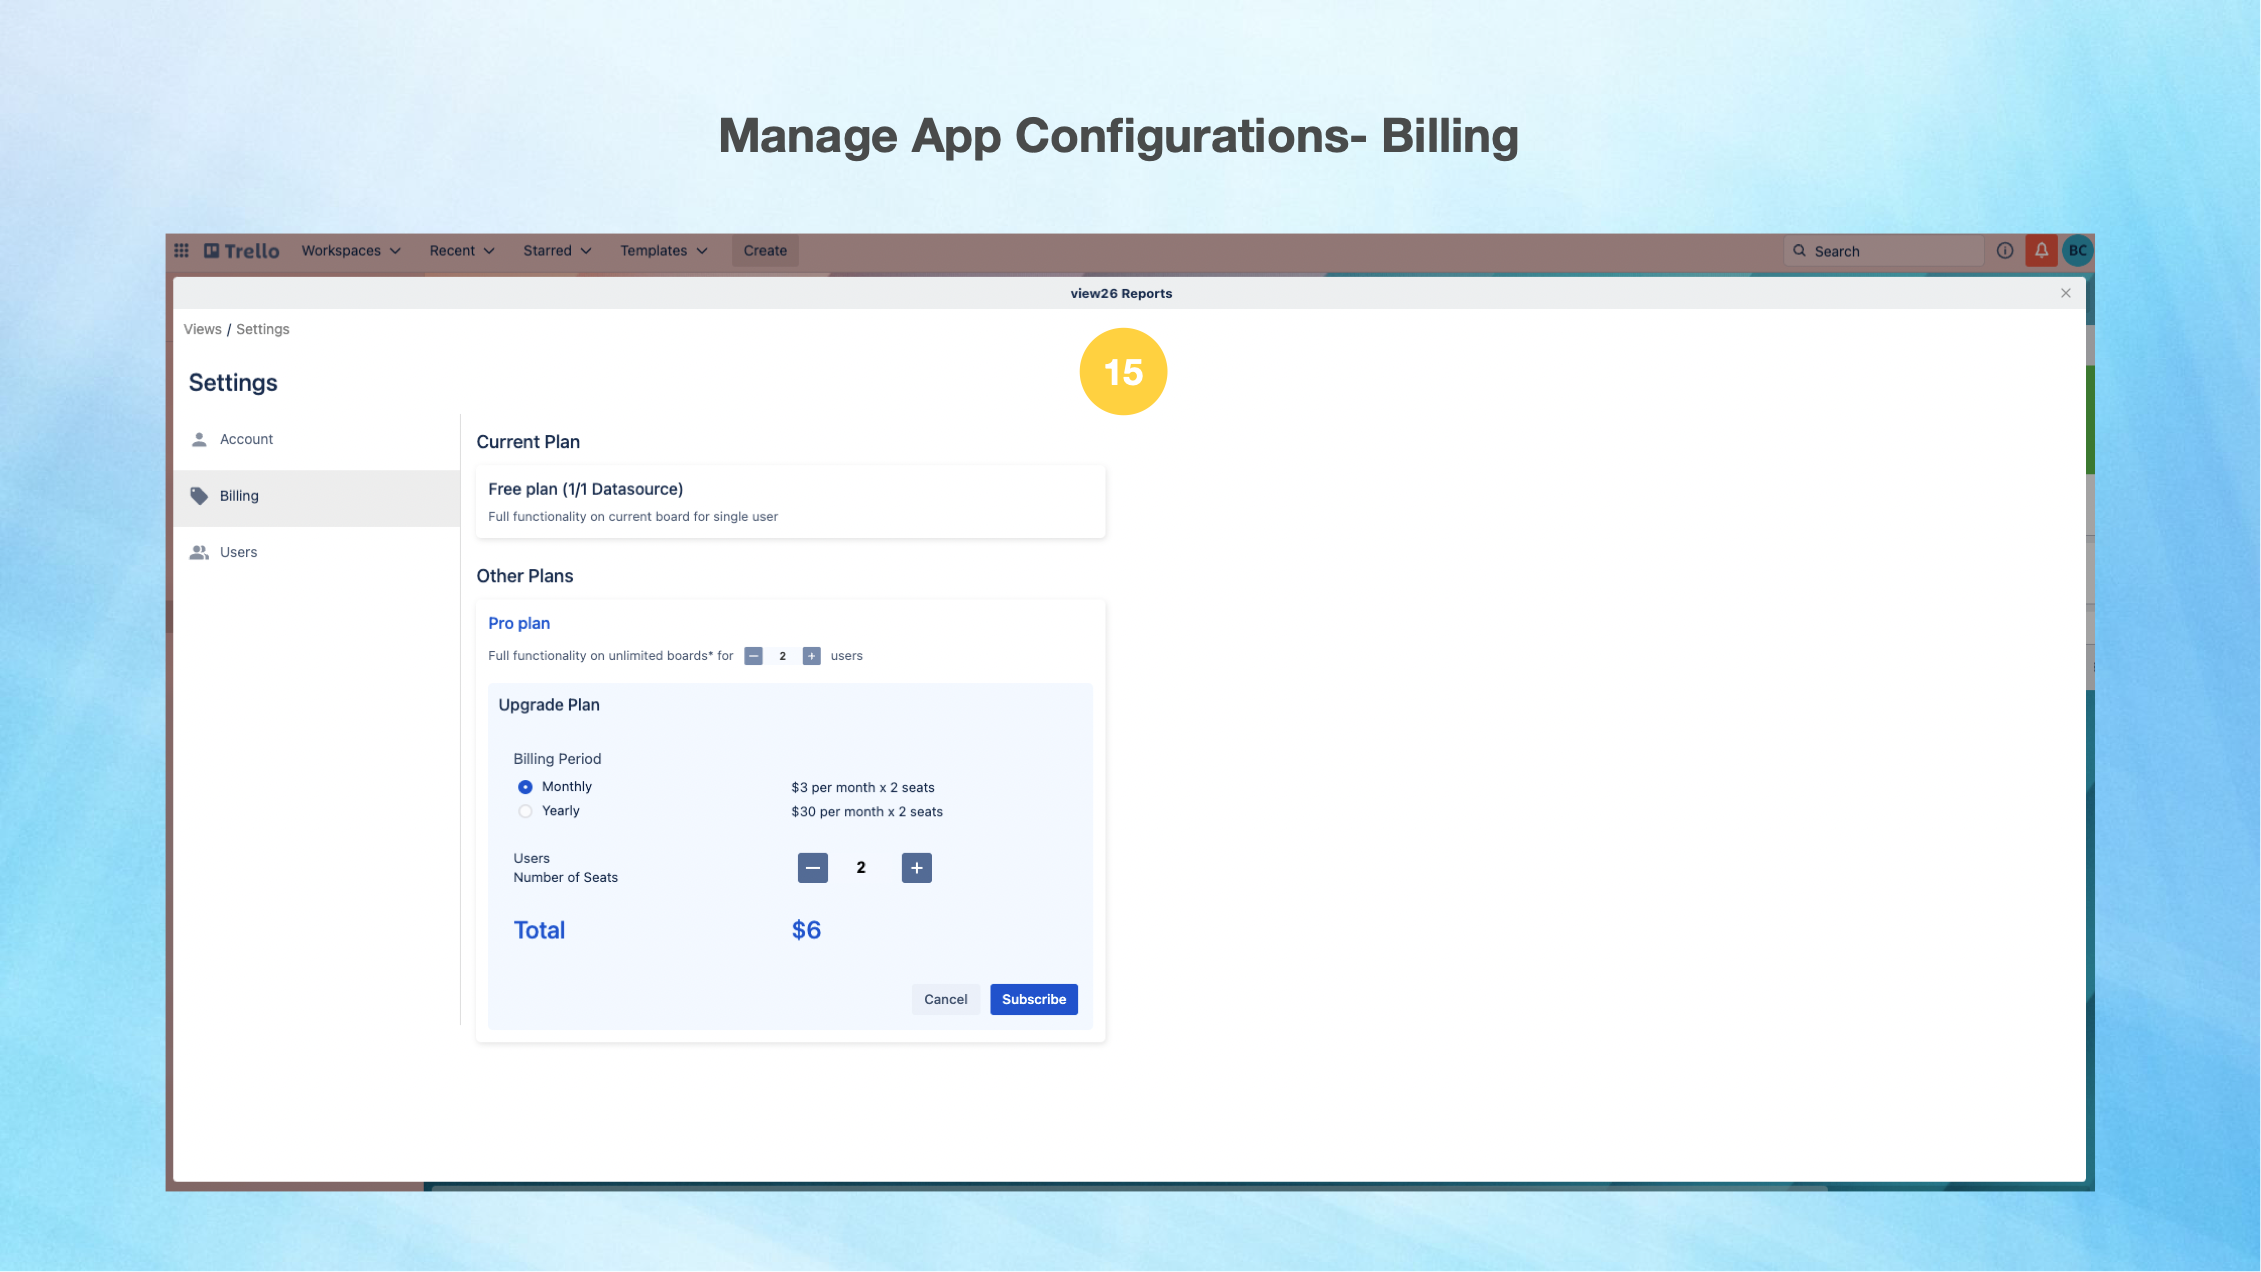
Manage App Configurations
15. If you have opted for the Free Plan , it will allow you to add one Datasource which guarantees full functionality on the current Board for a single User
You can always upgrade to the Pro Plans to add more users and add more than one Trello Boards.
You can add more than one Trello Board to your dashboard. This is particularly helpful if you have tasks across several boards or projects. We help you get the bigger picture, bringing all your data in one place; enabling you to view them all in a single chart .